How to Install Ubuntu Touch on Any Android Phone
This tutorial will be showing you how to install NextCloud on Ubuntu 20.04 LTS with Apache web server.
What's NextCloud?
NextCloud is a free open-source self-hosted cloud storage solution. It's functionally similar to Dropbox. Proprietary cloud storage solutions (Dropbox, Google Drive, etc) are convenient, but at a price: they can be used to collect personal data because your files are stored on their computers. If you worry about privacy, you can switch to NextCloud, which you can install on your private home server or on a virtual private server (VPS). You can upload your files to your server via NextCloud and then sync those files to your desktop computer, laptop or smartphone. This way you have full control of your data.
NextCloud Features
- Free and open-source
- End-to-end encryption, meaning files can be encrypted on client devices before uploaded to the server, so even if someone steals your server, they can not read your files.
- Can be integrated with an online office suite (Collobora Online, OnlyOffice) so you can create and edit your doc, ppt, xls files directly from NextCloud.
- The app store contains hundreds of apps to extend functionality (like calendar app, contacts app, note-taking app, video conferencing app, etc).
- The sync client is available on Linux, macOS, Windows, iOS and android.
Prerequisites
NextCloud is written in PHP programing language. To follow this tutorial, you first need to install LAMP stack on Ubuntu 20.04. If you haven't already done so, please check out the following tutorial.
- How to Install LAMP Stack (Apache, MariaDB, PHP7.4-FPM) on Ubuntu 20.04
You can install NextCloud on your home server or a VPS (virtual private server). You also need a domain name, so later on your will be able to enable HTTPS to encrypt the HTTP traffic. I registered my domain name from NameCheap because the price is low and they give whois privacy protection free for life. Nextcloud can be installed without a domain name, but it really doesn't make sense if you don't encrypt the HTTP connection to prevent snooping. I recommend buying a domain name, if you really want to tinker with server software and use them to the fullest potential.
Now let's install NextCloud.
Step 1: Download NextCloud on Ubuntu 20.04
Log into your Ubuntu 20.04 server. Then download the NextCloud zip archive onto your server. The latest stable version is 21.0.1 at time of this writing. You may need to change the version number. Go to https://nextcloud.com/install and click the download for server button to see the latest version.

You can run the following command to download it on your server.
wget https://download.nextcloud.com/server/releases/nextcloud-21.0.1.zip You can always use the above URL format to download NextCloud. If a new version comes out, simply replace 21.0.1 with the new version number.
Once downloaded, extract the archive with unzip.
sudo apt install unzip sudo unzip nextcloud-21.0.1.zip -d /var/www/ The -d option specifies the target directory. NextCloud web files will be extracted to /var/www/nextcloud/. Then we need to change the owner of this directory to www-data so that the web server (Apache) can write to this directory.
sudo chown www-data:www-data /var/www/nextcloud/ -R
Step 2: Create a Database and User for Nextcloud in MariaDB Database Server
Log into MariaDB database server with the following command. Since MariaDB is now using unix_socket plugin to authentication user login, there's no need to enter MariaDB root password. We just need to prefix the mysql command with sudo.
sudo mysql
Then create a database for Nextcloud. This tutorial name the database nextcloud. You can use whatever name you like.
create database nextcloud; Create the database user. Again, you can use your preferred name for this user. Replace your-password with your preferred password.
create user nextclouduser@localhost identified by 'your-password';
Grant this user all privileges on the nextcloud database.
grant all privileges on nextcloud.* to nextclouduser@localhost identified by 'your-password';
Flush privileges and exit.
flush privileges; exit;

Step 3: Create an Apache Virtual Host for Nextcloud
Create a nextcloud.conf file in /etc/apache2/sites-available/ directory, with a command-line text editor like Nano.
sudo nano /etc/apache2/sites-available/nextcloud.conf
Copy and paste the following text into the file. Replace nextcloud.example.com with your own preferred sub-domain. Don't forget to create DNS A record for this sub-domain in your DNS zone editor. If you don't have a real domain name, I recommend going to NameCheap to buy one. The price is low and they give whois privacy protection free for life.
<VirtualHost *:80> DocumentRoot "/var/www/nextcloud" ServerName nextcloud.example.com ErrorLog ${APACHE_LOG_DIR}/nextcloud.error CustomLog ${APACHE_LOG_DIR}/nextcloud.access combined <Directory /var/www/nextcloud/> Require all granted Options FollowSymlinks MultiViews AllowOverride All <IfModule mod_dav.c> Dav off </IfModule> SetEnv HOME /var/www/nextcloud SetEnv HTTP_HOME /var/www/nextcloud Satisfy Any </Directory> </VirtualHost> Save and close the file. (To save a file in Nano text editor, press Ctrl+O, then press Enter to confirm. To exit, press Ctrl+X.)
Then enable this virtual host.
sudo a2ensite nextcloud.conf
Run the following command to enable required Apache modules.
sudo a2enmod rewrite headers env dir mime setenvif ssl
Then test Apache configuration.
sudo apache2ctl -t
If the syntax is OK, reload Apache for the changes to take effect.
sudo systemctl restart apache2
Step 4: Install and Enable PHP Modules
Run the following commands to install PHP modules required or recommended by NextCloud.
sudo apt install imagemagick php-imagick libapache2-mod-php7.4 php7.4-common php7.4-mysql php7.4-fpm php7.4-gd php7.4-json php7.4-curl php7.4-zip php7.4-xml php7.4-mbstring php7.4-bz2 php7.4-intl php7.4-bcmath php7.4-gmp
Reload Apache to use these modules.
sudo systemctl reload apache2
Step 5: Enable HTTPS
Now you can access the Nextcloud web install wizard in your web browser by entering the domain name for your Nextcloud installation.
nextcloud.example.com

If the web page can't load, you probably need to open port 80 in firewall.
sudo iptables -I INPUT -p tcp --dport 80 -j ACCEPT
And port 443 as well.
sudo iptables -I INPUT -p tcp --dport 443 -j ACCEPT
Before entering any sensitive information, we should enable secure HTTPS connection on Nextcloud. We can obtain a free TLS certificate from Let's Encrypt. Install Let's Encrypt client (certbot) from Ubuntu 20.04 repository.
sudo apt install certbot python3-certbot-apache
Python3-certbot-apache is the Apache plugin. Next, run the following command to obtain a free TLS certificate using the Apache plugin.
sudo certbot --apache --agree-tos --redirect --staple-ocsp --email [email protected] -d nextcloud.example.com
Where:
- –apache2: Use the Apache authenticator and installer
- –agree-tos: Agree to Let's Encrypt terms of service
- –redirect: Enforce HTTPS by adding 301 redirect.
- –staple-ocsp: Enable OCSP Stapling.
- –email: Email used for registration and recovery contact.
- -d flag is followed by a list of domain names, separated by comma. You can add up to 100 domain names.
You will be asked if you want to receive emails from EFF(Electronic Frontier Foundation). After choosing Y or N, your TLS certificate will be automatically obtained and configured for you, which is indicated by the message below.

I found that Certbot can't automatically add HSTS header in the Apache config file for Nextcloud. If you would like to enable HSTS (HTTP Strict Transport Security), then edit the file.
sudo nano /etc/apache2/sites-enabled/nextcloud-le-ssl.conf
We can then add the following line in the SSL server block to enable HSTS header.
Header always set Strict-Transport-Security "max-age=31536000"
Like below.

Save and close the file. Then text Apache configurations.
sudo apache2ctl -t
If the test is successful, reload Apache for the change to take effect.
sudo systemctl reload apache2
The above configuration will get A+ score on SSL test.

Step 6: Finish the Installation in your Web Browser
Now you can access the Nextcloud web install wizard using HTTPS connection.
https://nextcloud.example.com
To complete the installation, you need to create an admin account, enter the path of Nextcloud data folder, enter database details you created in step 2. You can use the default localhost as host address, or you can enter localhost:3306, as MariaDB listens on port 3306.
The data folder is where users' files are stored. For security, it's best to place the data directory outside of Nextcloud webroot directory. So instead of storing users' files under /var/www/nextcloud/data/, we can change it to /var/www/nextcloud-data. which can be created with the following command:
sudo mkdir /var/www/nextcloud-data
Then make sure Apache user (www-data) has write permission to the data directory.
sudo chown www-data:www-data /var/www/nextcloud-data -R

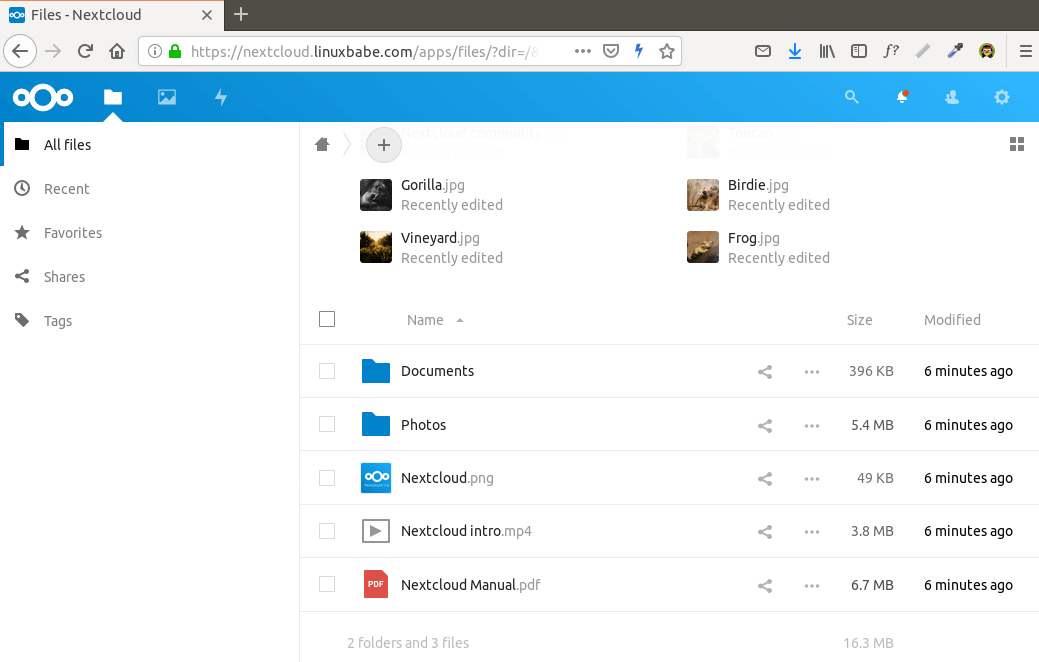
Click the Finish Setup button, you will see the Web interface of Nextcloud. Congrats! You can start using it as your private cloud storage.

How to Set up NextCloud Email Notification
If your NextCloud instance will be used by more than one person, it's important that your NextCloud server can send transactional emails, such as password-resetting email. First, you should set an email address for your own account. Go to Settings -> Personal Info and set an email address for your account.

Then go to Settings -> Basic settings. You will find the email server settings. There are two send modes: sendmail and smtp. You can choose the sendmail mode if your NextCloud host has an SMTP server running.

If you would like to use an SMTP server running on another host, then choose smtp mode and enter the SMTP server address and login credentials like below. Choose STARTTLS for encryption.

For how to set up an email server, please check out the following tutorial. Note that I highly recommend running iRedMail mail server on a fresh clean OS. Installing iRedMail on an OS that has other web applications can fail, and likely break existing applications.
- How to easily set up a full-featured mail server on Ubuntu 20.04 with iRedMail
How to Reset Nextcloud User Password From Command Line
If you lost your admin account password, and you didn't set up email delivery in Nextcloud, then you need to reset the password by running the following command on your server. Replace nextcloud_username with your real username.
sudo -u www-data php /var/www/nextcloud/occ user:resetpassword nextcloud_username There are also other commands you might find useful. List available commands with:
sudo -u www-data php /var/www/nextcloud/occ
or
sudo -u www-data php /var/www/nextcloud/console.php
How to Move the Data Directory
In case you need to move the NextCloud data directory, there are 4 steps to accomplish this. First, you need to use the cp command to copy the data directory to the new directory. For example, the mount point of my external hard drive is /media/linuxbabe/b43e4eea-9796-4ac6-9c48-2bcaa46353731. I create the new data directory on the external hard drive.
sudo mkdir /media/linuxbabe/b43e4eea-9796-4ac6-9c48-2bcaa46353731/nextcloud-data/
Then I copy the original data directory to the new data directory. -R flag means the copy operation is recursive.
sudo cp /var/www/nextcloud-data/* /media/linuxbabe/b43e4eea-9796-4ac6-9c48-2bcaa46353731/nextcloud-data/ -R
You also need to copy the .ocdata file.
sudo cp /var/www/nextcloud-data/.ocdata /media/linuxbabe/b43e4eea-9796-4ac6-9c48-2bcaa46353731/nextcloud-data/
Next, you need to set www-data (Apache user) as the owner.
sudo chown www-data:www-data /media/linuxbabe/b43e4eea-9796-4ac6-9c48-2bcaa46353731/nextcloud-data/ -R
Lastly, you need to edit the config.php file.
sudo nano /var/www/nextcloud/config/config.php
Find the following line and change the value of datadirectory.
'datadirectory' => '/var/www/nextcloud-data',
Save and close the file. Reload NextCloud web page and you are done.
Step 7: Increase PHP Memory Limit
The default PHP memory limit is 128MB. NextCloud recommends 512MB for better performance. To change PHP memory limit, edit the php.ini file.
sudo nano /etc/php/7.4/apache2/php.ini
Find the following line. (line 409)
memory_limit = 128M
Change the value.
memory_limit = 512M
Save and close the file. Alternatively, you can run the following command to change the value without manually opening the file.
sudo sed -i 's/memory_limit = 128M/memory_limit = 512M/g' /etc/php/7.4/apache2/php.ini
Then reload Apache for the changes to take effect.
sudo systemctl reload apache2
If your server has the /etc/php7.4/fpm/php.ini file, that means your server also runs PHP-FPM. I recommend changing the memory_limit in PHP-FPM as well.
sudo nano /etc/php/7.4/fpm/php.ini
Find the memory_limit parameter and change the value. After saving the file, reload PHP-FPM for the change to take effect.
sudo systemctl reload php7.4-fpm
Step 8: Configure Redis Cache for NextCloud
If you go to your NextCloud settings -> overview page, you might see the following warning:
No memory cache has been configured. To enhance your performance please configure a memcache if available.
We will enable memory caching for nextCloud by using Redis. Run the following command to install Redis server from Ubuntu repository.
sudo apt install redis-server
You can check the version with:
redis-server -v
Sample output:
Redis server v=5.0.7 sha=00000000:0 malloc=jemalloc-5.2.1 bits=64 build=636cde3b5c7a3923
Now we can check if redis server is running.
systemctl status redis

Hint: If the above command didn't quit immediately, you can press the Q key to gain back control of the terminal.
From the above screenshot, we can see that it's running and auto-start is enabled. If for any reason it's not running, execute the following command:
sudo systemctl start redis-server
And if auto-start at boot time is not enabled, you can use the following command to enable it:
sudo systemctl enable redis-server
In order to configure Redis as a cache for nextCloud, we need to install the PHP extension for interfacing with Redis.
sudo apt install php-redis
Check if the extension is enabled.
php --ri redis

We can see that Redis extension is enabled. If it's not enabled, run the following command:
sudo phpenmod redis
You may also need to reload Apache if the redis extension is still not enabled.
sudo systemctl reload apache2
Next, edit nextCloud configuration file.
sudo nano /var/www/nextcloud/config/config.php
Add the following lines above the ending ); line.
'memcache.distributed' => '\OC\Memcache\Redis', 'memcache.local' => '\OC\Memcache\Redis', 'memcache.locking' => '\OC\Memcache\Redis', 'redis' => array( 'host' => 'localhost', 'port' => 6379, ),

Save and close the file. Then restart Apache and PHP-FPM.
sudo systemctl restart apache2 php7.4-fpm
Now go to NextCloud settings -> overview page again and refresh the web page, the warning about memory caching should be gone.
Adding Missing Indexes
If you see the following message in the NextCloud Settings -> Overview page,
The database is missing some indexes. Due to the fact that adding indexes on big tables could take some time they were not added automatically.
Then you need to manually add those indexes. Change to the Nextcloud webroot directory.
cd /var/www/nextcloud/
Run the following command to add indexes to the Nextcloud database.
sudo -u www-data php occ db:add-missing-indices

Now if you refresh the NextCloud Settings -> Overview page, the warning about missing indexes should be gone.
Conversion to Big Int
If you see the following message in the NextCloud Settings -> Overview page,
Some columns in the database are missing a conversion to big int. Due to the fact that changing column types on big tables could take some time they were not changed automatically.
Then you need to manually change the column type. Change to the Nextcloud webroot directory.
cd /var/www/nextcloud/
Change your Nextcloud into maintenance mode to prevent users from logging in and making changes.
sudo - u www - data php occ maintenance : mode -- on
Then run the following command to change the column type.
sudo -u www-data php occ db:convert-filecache-bigint
Once it's done, switch off the maintenance mode.
sudo - u www - data php occ maintenance : mode -- off

Now if you refresh the NextCloud Settings -> Overview page, the warning about big int should be gone.
How to Install NextCloud Client on Ubuntu 20.04 Desktop
Run the following commands on Ubuntu 20.04 desktop to install the client from the default repository.
sudo apt install nextcloud-client
NextCloud Client on Ubuntu 20.04

Client software for macOS, Windows, Android and iOS can be found on the Nextcloud download page.
How to Enable OnlyOffice/Collabora Online
By default, Nextcloud ships with support for OnlyOffice, which an online office suite that allows you to edit your doc, ppt, xls files directly from NextCloud. We only need to install an app to use this feature. Go to Nextcloud Apps -> Office & Text. Find and enable the community document server app.

Now when you click the add button (+) in Nextcloud, you will be able to create Word, spreadsheet and presentation documents right from your Nextcloud server.


However, I found this app isn't very reliable. And the community edition allows only 20 users at most. You need to purchase an enterprise edition if you have more than 20 users. There's another open-source LibreOffice-based online office suite called Collabora Online that has the same functionality, but without the limitation on the number of users. You can read the following article to integrate it with Nextcloud.
- Integrate Collabora Online with Nextcloud on Ubuntu with Docker
Increase Upload File Size Limit
If you use the Apache PHP module to run PHP script, then there's no upload file size limit. If you use PHP-FPM to run PHP script, you need to change the file size limit. The default maximum file size for uploading in PHP-FPM is 2MB. To increase the upload size limit, edit the PHP configuration file.
sudo nano /etc/php/7.4/fpm/php.ini
Find the following line (line 846).
upload_max_filesize = 2M
Change the value like below:
upload_max_filesize = 1024M
Save and close the file. Alternatively, you can run the following command to change the value without manually opening the file.
sudo sed -i 's/upload_max_filesize = 2M/upload_max_filesize = 1024M/g' /etc/php/7.4/fpm/php.ini
Then restart PHP-FPM.
sudo systemctl restart php7.4-fpm
Enabling HTTP/2 Protocol
HTTP/2 protocol can greatly improve page loading speed. You can read the following guide to enable HTTP/2 protocol on Apache.
- How to Enable HTTP/2 Protocol with Apache on Ubuntu 20.04
Adding Local DNS Entry
It's recommended to edit the /etc/hosts file on your Nextcloud server and add the following entry, so that Nextcloud itself won't have to query the public DNS, which can improve the overall stability. If your Nextcloud server can't resolve the nextcloud.example.com hostname, then you may encounter a 504 gateway time out error.
127.0.0.1 localhost nextcloud.example.com An IP address in the /etc/hosts file can have multiple hostnames, so if you have other applications installed on the same box, you can also add other hostnames or sub-domains on the same line like this:
127.0.0.1 localhost focal ubuntu nextcloud.example.com collabora.example.com Using Cron to Run Background Jobs
By default, Nextcloud uses AJAX to execute one task with each page load. You can use the more efficient system cron service to run background jobs. Go to Nextcloud Settings -> Basic Settings and select Cron.

Next, edit the www-data user's crontab file.
sudo -u www-data crontab -e
Add the following line in this file, so the cron job will run every 5 minutes.
*/5 * * * * php7.4 -f /var/www/nextcloud/cron.php
Save and close the file.
Troubleshooting Tips
If you encounter errors, you can check one of the following log files to find out what's wrong.
- Apache error log:
/var/log/apache2/error.log - Apache error log for the Nextcloud virtual host:
/var/log/apache2/nextcloud.error - Nextcloud application log:
/var/www/nextcloud/data/nextcloud.log
For example, I once had an "Internal Server Error" on my Nextcloud instance and the /var/log/nginx/nextcloud.error file told me that
FastCGI sent in stderr: "PHP message: PHP Fatal error: Uncaught OC\HintException: [0]: Memcache \OC\Memcache\Redis not available for local cache (Is the matching PHP module installed and enabled?)
It turned out that because I used the ppa:ondrej/php PPA on my Ubuntu server, I also need to install php7.4-redis in addition to the php-redis package.
If you see the following error message in the nextcloud.log file, you can ignore it.
Could not detect any host in https:///data/htaccesstest.txt
Upgrading Nextcloud
It's important to keep your Nextcloud server up to date with the latest security and bug fixes. Read the tutorial below to learn how to upgrade Nextcloud.
- 2 Ways to Upgrade Nextcloud [Command-Line & GUI]
Wrapping Up
I hope this tutorial helped you install NextCloud on Ubuntu 20.04 server with Apache. As always, if you found this post useful, then subscribe to our free newsletter to get more tips and tricks. Take care 🙂
How to Install Ubuntu Touch on Any Android Phone
Source: https://www.linuxbabe.com/ubuntu/install-nextcloud-ubuntu-20-04-apache-lamp-stack